
Character Assignment - ZBrush Clothing and Hair

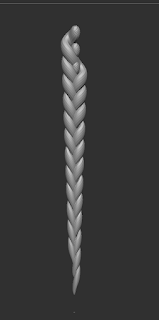
I'm very nearly finished my sculpt, just need to add my skirt and tidy up a few things before I paint and pose. I was really unsure to begin with how I would make my braid for the hair but I found a video on YouTube that really helped:


So I used this as a basis to build my braid before adding a sphere for the rest of the hair and sculpting it until I was happy.


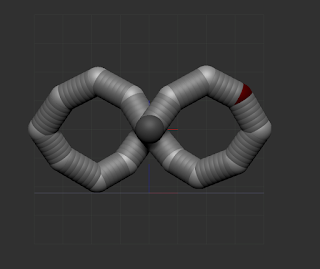
With the hair finished I tidied up some things on the body before adding in some clothing. I built the bracelets in Maya using a torus and pushing the inner ring further into the centre to create a more concave shape. I also built the basis of the gauntlet in Maya using primitives of boxes and deformers to build the basic shape before importing the individual pieces into ZBrush to build the whole gauntlet.

I then used masking and the extract tool to pull out the base clothing before going in and adding in bandage-like details.


I'm really happy with what I've been able to achieve so far considering I had never used ZBrush before starting this course. I'm looking forward to putting on some colour on Monday and seeing the character come together.

On a side note, ZBrush is super addictive... I may lose my Christmas to it!

Comments

Popular posts from this blog

Cure - Advanced Skeleton 5

I spent a fair chunk of the day yesterday playing around with Advanced Skeleton 5 in Maya and honestly, it's amazing. I wasn't sure how well it would work with my model because it is so low poly but I came out surprisingly well. So Advanced Skeleton gives you the joints from a template and once they're all lined up you can build the controllers to see how it will move. Because you do all of this in stages, you can change and update the rig at any point.  There are a few different methods to bind the skin and this is one of them, but in the end I didn't use the Skin Cage because it didn't seem necessary for my model. Once the body rig was done I spent a LONG time trying to get the facial rig to work. I was clearly doing something wrong the first few times I tried it because it worked just fine when I sat down and worked through it step by step! The skeleton also comes with pre-made walk cycles so I put my character into these to see how the de...

Cure - Feedback and Final Tweaks

After our final presentations on Friday I took on board the feedback from the lecturers and implemented it into a final version of Cure. I agreed with everything they said and listed off what needed to be fixed: The biggest issue was that the story wasn't coming across properly as the 'dying polygons' were only ever there in the first few shots and the character didn't seem to lose that many polygons. There were some camera shots that lingered for almost 10 seconds and they needed some variation. Some of the animation needed to be more obvious and expressive. There were errors in the recording from Unity, the eyes flickered and the lighting updates needed to be cut at the beginning of each camera change. The sound needed to be boasted as it didn't come across through a TV. I first fixed the issues of the dying polygons by adding more black polygons to the character that progressively spread as the film went on until she got the cure. I kept these to the...

Tumblr

I've really enjoyed keeping a production blog throughout my masters course so I'm hoping on over to Tumblr where I can follow some other awesome 3D artists! So you can find me here: http://harlequin-werewolf.tumblr.com/ Also, a few of my classmates are on Tumblr here: https://diebrigkuchler.tumblr.com/ https://myanimationjourney.tumblr.com/ https://picturemoving.tumblr.com/ https://tututugod.tumblr.com/ http://mayacossette.tumblr.com/